
It’s been a while since I posted — I’ve been busy studying for the CEH exam… and yeah, I failed 😅. It sucks, but I’m planning to retake it soon. In the meantime, I wanted to keep the momentum going and share something practical and hands-on. So here’s a blog post about tooling — and specifically, the infamous WiFi Pineapple.
As part of my pentesting journey, I believe it’s not just about certifications or theory. You’ve also got to get your hands dirty and explore the tools hackers and red teamers use in the wild. One of those tools that keeps popping up in talks and demos is the WiFi Pineapple — often portrayed as this hacker’s dream device. You see it in DEFCON demos, hacker news stories, and YouTube tutorials.
But instead of just buying one, I thought: Why not build my own? That way, I learn how it works from the inside out. In this post, I’ll walk you through how I built my own DIY Pineapple, how it performed, and how it compares to just using your laptop and a WiFi adapter.
🔧Hardware
After After doing some research, I came across the WiFi Pineapple Cloner project — an open-source repo that guides you through building a low-cost Pineapple alternative. It’s designed for education and personal testing, and seemed like the perfect weekend project.
Here’s the shopping list I went with:
- Router: GL.iNet GL-MT300N-V2
- WiFi Adapters: 2× RT5572 dual-band (2.4GHz + 5GHz)
- USB Hub: Powered, with external power brick
- Flash Storage: 8GB USB flash drive
- Power Source: USB battery bank
Once connected, it looks like a compact hacker box. Easy to hide in a backpack, and since it’s low-power, you can run it for hours on battery. That mobility makes it ideal for testing in different environments (coffee shops, airports, etc — if you’re into red teaming scenarios)

⚙️ Using the Device
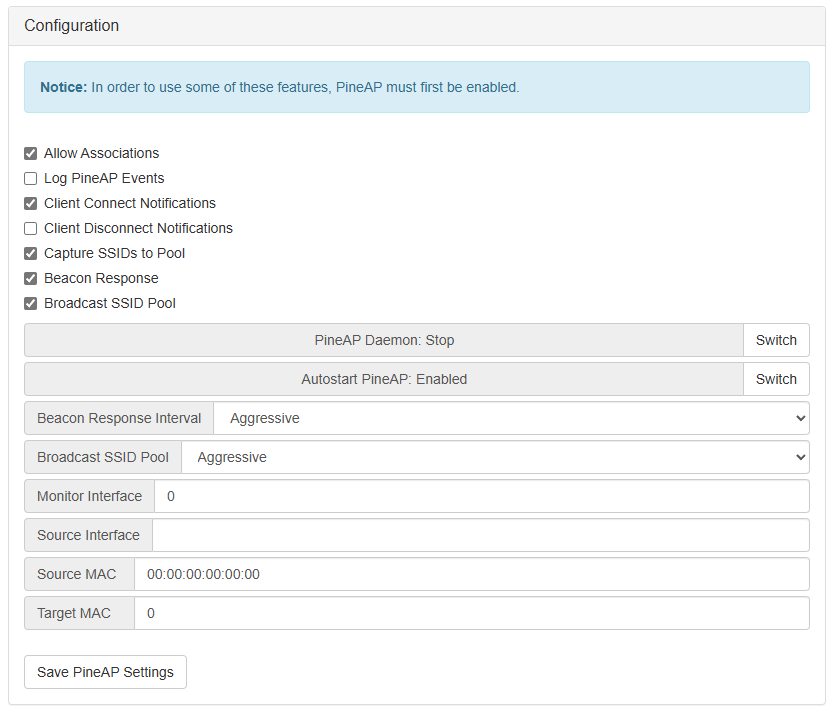
Flashing the firmware and getting the software running was pretty straightforward, thanks to the instructions in the GitHub repo. Once booted, you get a web UI very similar to the official Hak5 interface.
Naturally, I went straight to the Modules tab to try out the cool stuff. I started with:
- EvilPortal – to create fake login pages
- Deauth – to kick clients off real networks
Both worked, kind of. While the UI was clean and the workflow intuitive, the software itself felt very unstable. PineAP (the rogue AP tool) would crash or fail to start about 50% of the time. SSHing in to debug didn’t reveal much, and online documentation was limited. The wierd issue I was having:
After a few hours of fighting with buggy configs, I stepped back and asked myself:
“Is this really worth all the effort, when I could just plug these antennas into my Kali laptop and run everything locally?”
That’s when I remembered I can use the same antennas on my laptop. So I switched gears and plugged them directly into my Kali laptop.
💻 Kali Setup
If you’re even a little familiar with WiFi attacks, you probably know Airgeddon — a super easy-to-use bash script that automates Evil Twin attacks. Combined with a good antenna (like the ALFA AWUS036ACH or those RT5572s), it makes launching a fake WiFi network stupidly easy. Even a script kiddie can set up a fake captive portal these days. Here’s a great guide: Evil Twin WiFi Attack: A Step-By-Step Guide This tool is polished, well-documented, and does way more than I expected.
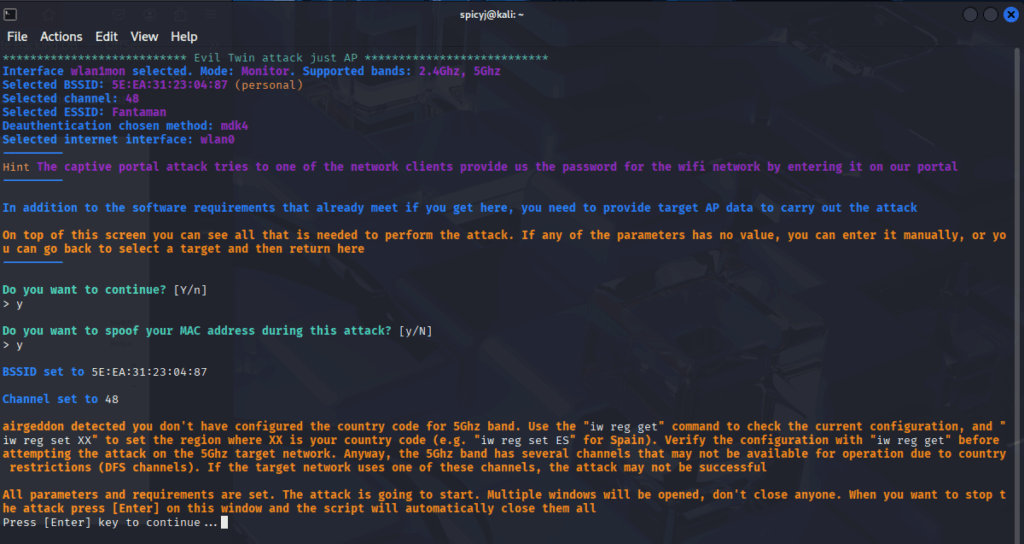
With a bit of fiddling, I had a working fake login page in no time:

Honestly, setting up a fake AP on Kali was way easier and quicker than doing it on the Pineapple. You also get access to more advanced tools, better error logging, and a familiar Linux environment.
What I Learned
While building the Pineapple was a fun project, it also taught me a few lessons:
- ✅ Building tools yourself teaches you how they work under the hood
- ❌ Open-source clones often lack stability and polish compared to commercial ones
- 🧰 A Kali laptop with good antennas is more versatile, and you can run any script or exploit you want
- 🔒 Modern systems are smarter — many OSes warn users about rogue networks and fake portals now
I also realized how important it is to balance time vs reward. I could’ve spent days debugging the PineAP module… or just move on and use tools that work reliably. As a pentester, your time matters. Being efficient often wins over being “cool.”
🧠 Final Verdict
Building a DIY Pineapple was a great learning experience — but I’ll be honest: I didn’t get that much out of it. Could be user error, or maybe I just needed more time. But for me, using Kali with an external WiFi adapter was faster, more flexible, and more powerful. That said, I still see the appeal of the Pineapple — especially the official Hak5 versions. They offer a smoother, more polished experience for plug-and-play attacks. If your goal is stealth and portability, the Pineapple is still a cool piece of kit. But if you’re more experienced or want full control, a Kali laptop with a good WiFi card can do the exact same thing — and then some. Also, let’s not forget: Evil Portals and fake APs aren’t as effective as they used to be. People today are more aware of suspicious networks, and modern systems often warn users or block automatic connections.